Project Title : Blue Organza Petticoat
Short Project Description: I just got my ruffler foot in the mail, and I need to get rid of some organza that's taking up space in my fabric stash, so I'm going to test it out. I'll also do a short review of the ruffler foot once I'm done.
Projected Deadline: Hopefully by the end of the week, if I can stop being a derpface.
Pattern(s) Used: None. Just going off my waist measurement.
Materials needed: I've got everything I need, as this is a stash-buster sort of project.
Challenges or obstacles : Organza is terrible, and I've never used a ruffler foot before. I also derped through part of it already and sewed the wrong tiers together, so I'm unpicking four yards of stitching right now. x_x;
I'm also trying to avoid buying more stuff for this, so it's going to have multiple colored threads for the stitching instead of matching thread like you're supposed to. Wooo, I'm cheap.
Actual Finish Date: March 23rd
Did you make changes from original plan?: Plan? What plan?
Did you discover something you want to share?: Ruffler feet are a pain to learn, but once you get it, it's a lot easier than gathering by hand.
How happy are you with the result? Eh, it's okay. I'd give it maybe 80%.
Okay, so I didn't use a pattern for this, and just went off my waist measurement (42in).
Originally I was going to have the top tier be 3x my waist gathered into a waistband, but went with slightly less but somewhat easier and just used the width of the organza for the waist, and doubled it from there.
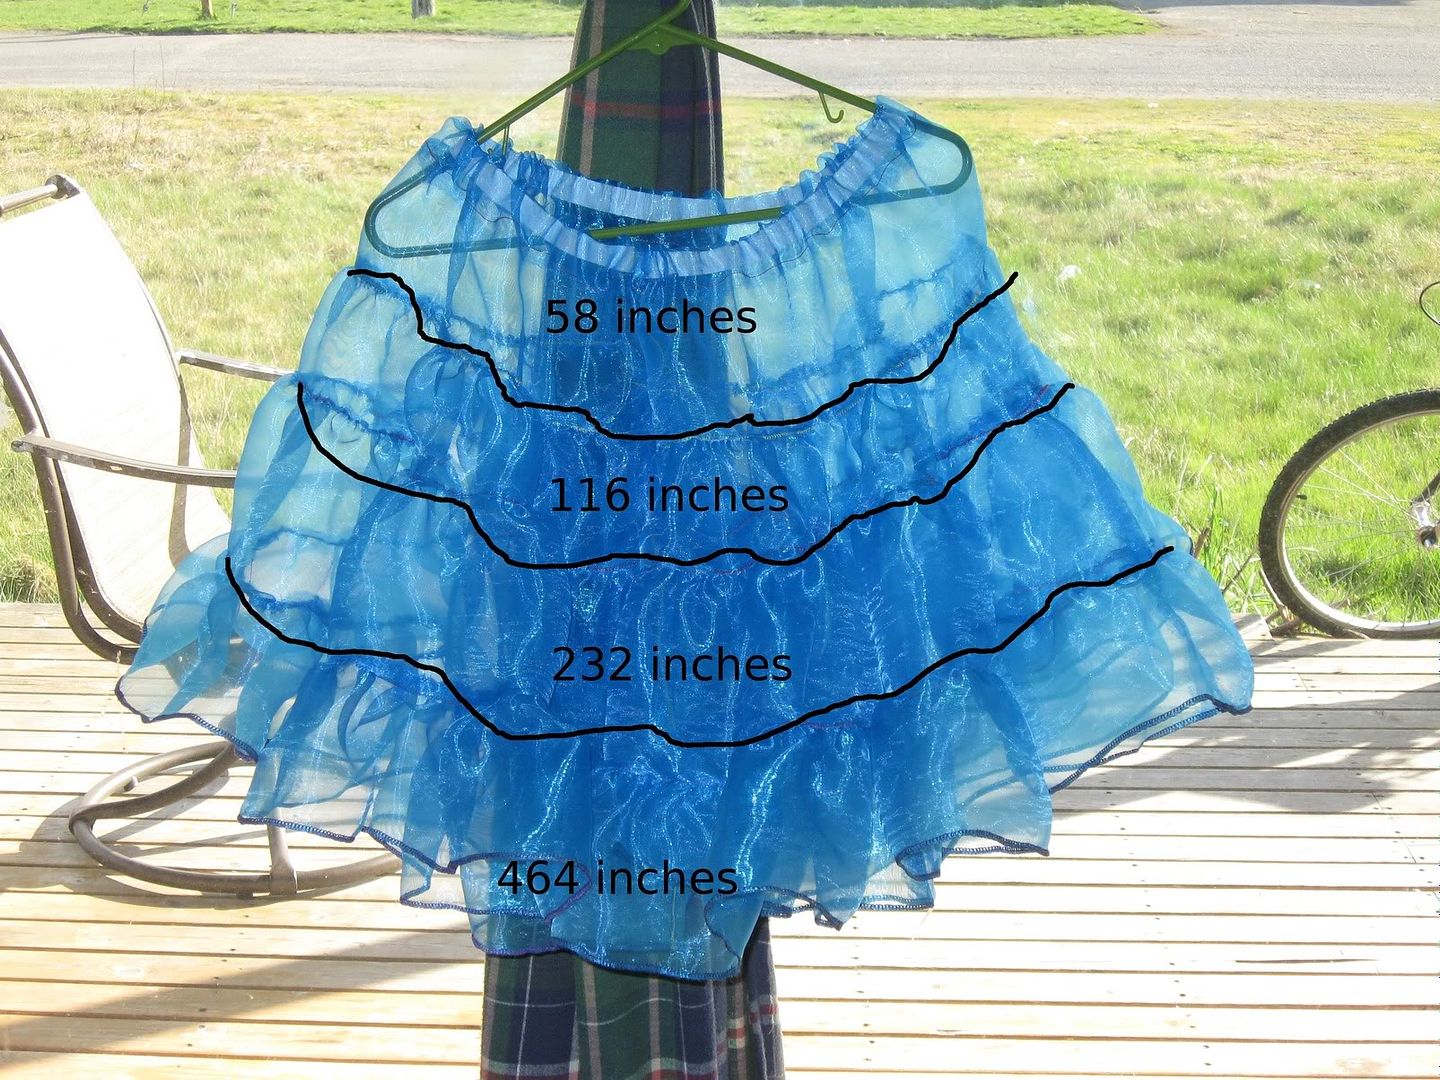
If I were to do this again I'd probably shoot for the full 3x. I also madea few several mistakes that I'd try to avoid.
One, I accidentally sewed the bottom tier to the first tier and had to pick out my stitches. When that was done, I had several holes in my first tier and working around that made it noticeably shorter, and I had to compensate by making the waist a lot longer than it should be, which also makes it less cupcake shaped.
Two, I didn't have anywhere near enough thread, so this thing is held together with blue, pink, purple, red, and yellow thread.
Three, I'd do more than one layer next time. This is decently poofy, but it could be better.
Four, I'm lazy and didn't do a decent finish on any of my seams and only overlocked the bottom edge. It also took twice as long as needed because of the aforementioned laziness. If I hadn't made Mistake One, and hadn't lazed around watching television all day yesterday, I probably could have gotten this done in a day.
Yeah, you read that right. Even with the learning curve on the ruffler, I could probably knock out a single layer petticoat in a day. Next time I'll test that hypothesis.
And five, long strips of delicate fabric will somehow grow cats if left unattended.
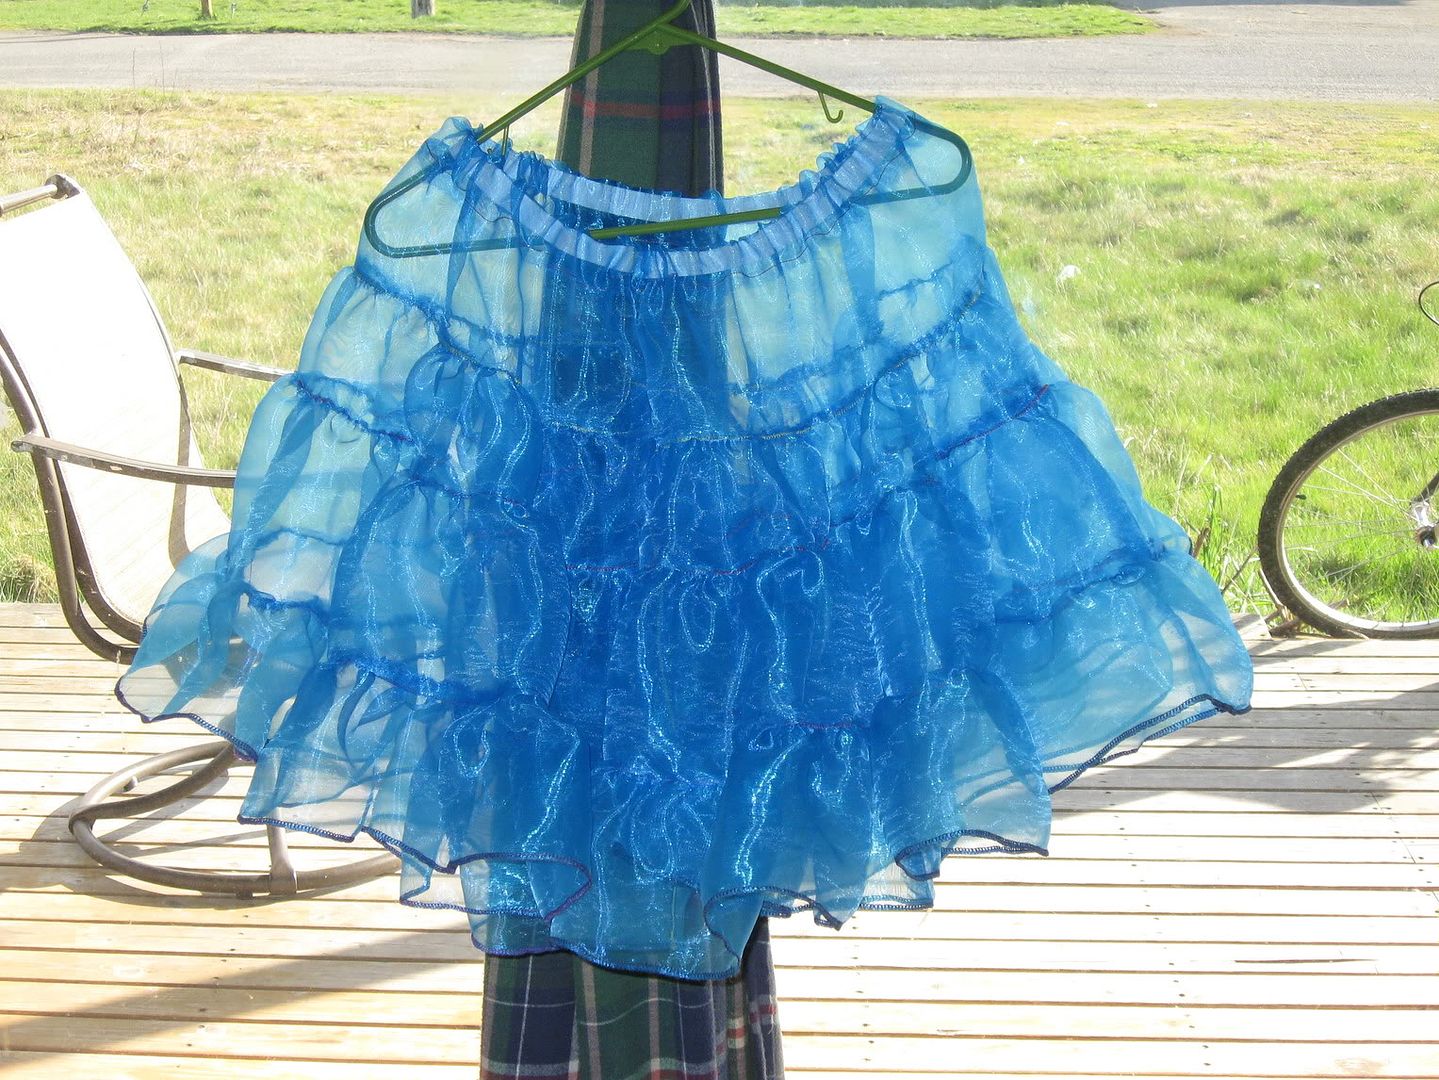
Aaaaand another picture of the petti without all my doodles on it. Eventually I'll get some pictures of me wearing the dang thing, but that's got to wait until tomorrow, since by the time the boyfriend gets home, it'll be dark out. :(
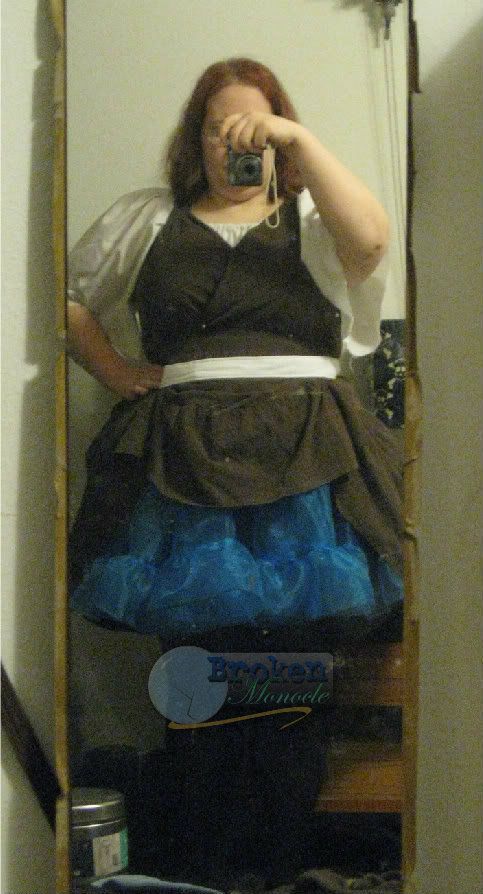
Worn under a modified offbrand JSK.
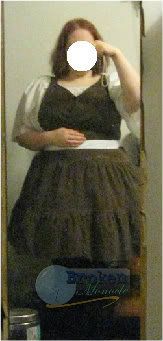
And the belt is for hiking up the skirt to show off a pretty imaginary underskirt that I don't have made yet.
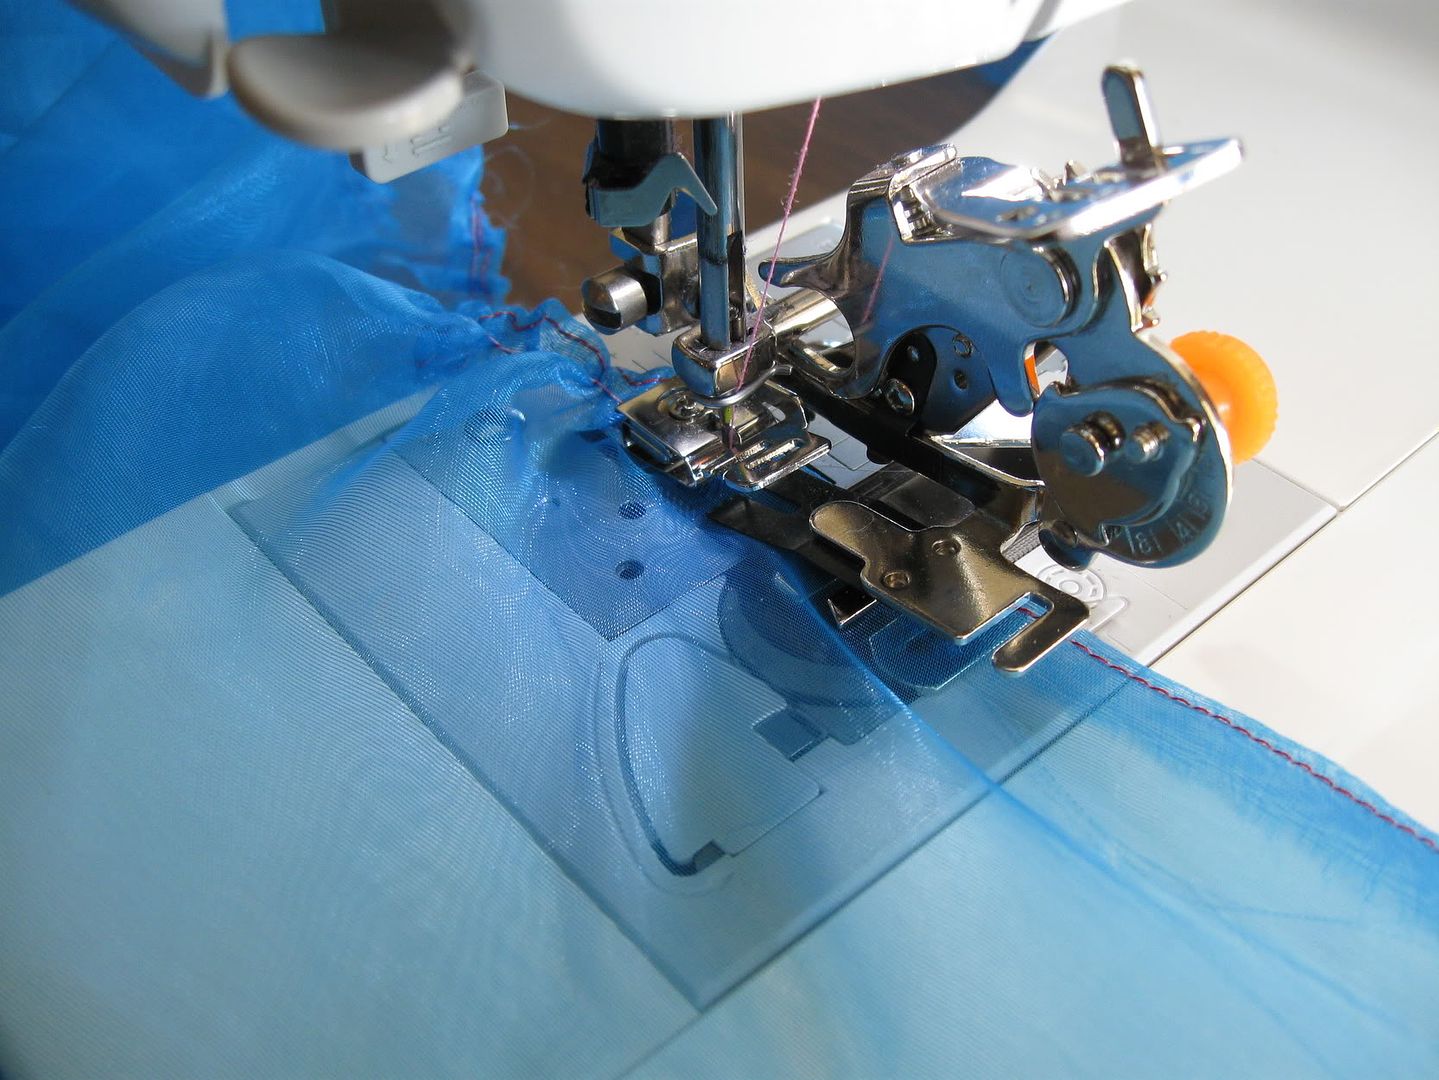
Okay, I bought this ruffler foot off of Amazon. The Super Saver Shipping option is totally worth it if you're not in a hurry, because it takes a week to get it. I used the Ruffler Unruffled instructions (free download) which is a 30 page PDF on how to use a ruffler foot, because the included instructions were crap.
Once I got the hang of it, the ruffler works great! HOWEVER, there is abit of a big learning curve, especially when it comes to delicate fabrics like organza.
Problems I ran into:
1: I found that it doesn't work well at all on single layers of organza, as it tends to create holes.
2: The seam allowance on the fabric guide is narrow enough that the stitching will pull out of an unfinished edge.
3: It ruffles too well.
Solutions I found:
The solution I used for 1 and 2 is to just do a simple folded hem along the edge to be ruffled.
As for 3, I'm just going to have to fiddle some more with stitches per ruffle and stitch length if I ever want something with less ruffle to it. It gathered at a 3-1 ratio right off the bat with a 2.5 stitch length and a single stitch per ruffle. I had to turn my stitch length all the way up (5) to get it down to a 2-1 ratio.
Miscellaneous tidbits:
You've got to turn the tension up a LOT higher than you think to avoid tangled threads. I usually set my tension at around 4, and had to crank it all the way up to 7 before it stopped snarling.
Since I have a drop-in bobbin, it's impossible to change the bobbin with the foot attached, so make sure to have a full bobbin before you start ruffling.
It makes a lot more noise than I expected. I kept stopping to check my needle and bobbin because it sounds like something's going wrong with the machine.
I know that there's a way to ruffle the top fabric and join it to the (nonruffled) bottom fabric, but I need to do more fiddling to figure it out. Otherwise, zigzag stitches work well for joining a ruffled bit to an unruffled bit without squashing or distorting the ruffles.
So there you have it! If you're serious about DIY petticoats, I highly suggest that you get a ruffler foot, and this is a bit cheaper, but works just fine. Totally worth it.
Short Project Description: I just got my ruffler foot in the mail, and I need to get rid of some organza that's taking up space in my fabric stash, so I'm going to test it out. I'll also do a short review of the ruffler foot once I'm done.
Projected Deadline: Hopefully by the end of the week, if I can stop being a derpface.
Pattern(s) Used: None. Just going off my waist measurement.
Materials needed: I've got everything I need, as this is a stash-buster sort of project.
Challenges or obstacles : Organza is terrible, and I've never used a ruffler foot before. I also derped through part of it already and sewed the wrong tiers together, so I'm unpicking four yards of stitching right now. x_x;
I'm also trying to avoid buying more stuff for this, so it's going to have multiple colored threads for the stitching instead of matching thread like you're supposed to. Wooo, I'm cheap.
Actual Finish Date: March 23rd
Did you make changes from original plan?: Plan? What plan?
Did you discover something you want to share?: Ruffler feet are a pain to learn, but once you get it, it's a lot easier than gathering by hand.
How happy are you with the result? Eh, it's okay. I'd give it maybe 80%.
Okay, so I didn't use a pattern for this, and just went off my waist measurement (42in).
Originally I was going to have the top tier be 3x my waist gathered into a waistband, but went with slightly less but somewhat easier and just used the width of the organza for the waist, and doubled it from there.
If I were to do this again I'd probably shoot for the full 3x. I also made
One, I accidentally sewed the bottom tier to the first tier and had to pick out my stitches. When that was done, I had several holes in my first tier and working around that made it noticeably shorter, and I had to compensate by making the waist a lot longer than it should be, which also makes it less cupcake shaped.
Two, I didn't have anywhere near enough thread, so this thing is held together with blue, pink, purple, red, and yellow thread.
Three, I'd do more than one layer next time. This is decently poofy, but it could be better.
Four, I'm lazy and didn't do a decent finish on any of my seams and only overlocked the bottom edge. It also took twice as long as needed because of the aforementioned laziness. If I hadn't made Mistake One, and hadn't lazed around watching television all day yesterday, I probably could have gotten this done in a day.
Yeah, you read that right. Even with the learning curve on the ruffler, I could probably knock out a single layer petticoat in a day. Next time I'll test that hypothesis.
And five, long strips of delicate fabric will somehow grow cats if left unattended.
Aaaaand another picture of the petti without all my doodles on it. Eventually I'll get some pictures of me wearing the dang thing, but that's got to wait until tomorrow, since by the time the boyfriend gets home, it'll be dark out. :(
Worn under a modified offbrand JSK.
And the belt is for hiking up the skirt to show off a pretty imaginary underskirt that I don't have made yet.
Okay, I bought this ruffler foot off of Amazon. The Super Saver Shipping option is totally worth it if you're not in a hurry, because it takes a week to get it. I used the Ruffler Unruffled instructions (free download) which is a 30 page PDF on how to use a ruffler foot, because the included instructions were crap.
Once I got the hang of it, the ruffler works great! HOWEVER, there is a
Problems I ran into:
1: I found that it doesn't work well at all on single layers of organza, as it tends to create holes.
2: The seam allowance on the fabric guide is narrow enough that the stitching will pull out of an unfinished edge.
3: It ruffles too well.
Solutions I found:
The solution I used for 1 and 2 is to just do a simple folded hem along the edge to be ruffled.
As for 3, I'm just going to have to fiddle some more with stitches per ruffle and stitch length if I ever want something with less ruffle to it. It gathered at a 3-1 ratio right off the bat with a 2.5 stitch length and a single stitch per ruffle. I had to turn my stitch length all the way up (5) to get it down to a 2-1 ratio.
Miscellaneous tidbits:
You've got to turn the tension up a LOT higher than you think to avoid tangled threads. I usually set my tension at around 4, and had to crank it all the way up to 7 before it stopped snarling.
Since I have a drop-in bobbin, it's impossible to change the bobbin with the foot attached, so make sure to have a full bobbin before you start ruffling.
It makes a lot more noise than I expected. I kept stopping to check my needle and bobbin because it sounds like something's going wrong with the machine.
I know that there's a way to ruffle the top fabric and join it to the (nonruffled) bottom fabric, but I need to do more fiddling to figure it out. Otherwise, zigzag stitches work well for joining a ruffled bit to an unruffled bit without squashing or distorting the ruffles.
So there you have it! If you're serious about DIY petticoats, I highly suggest that you get a ruffler foot, and this is a bit cheaper, but works just fine. Totally worth it.
No comments:
Post a Comment